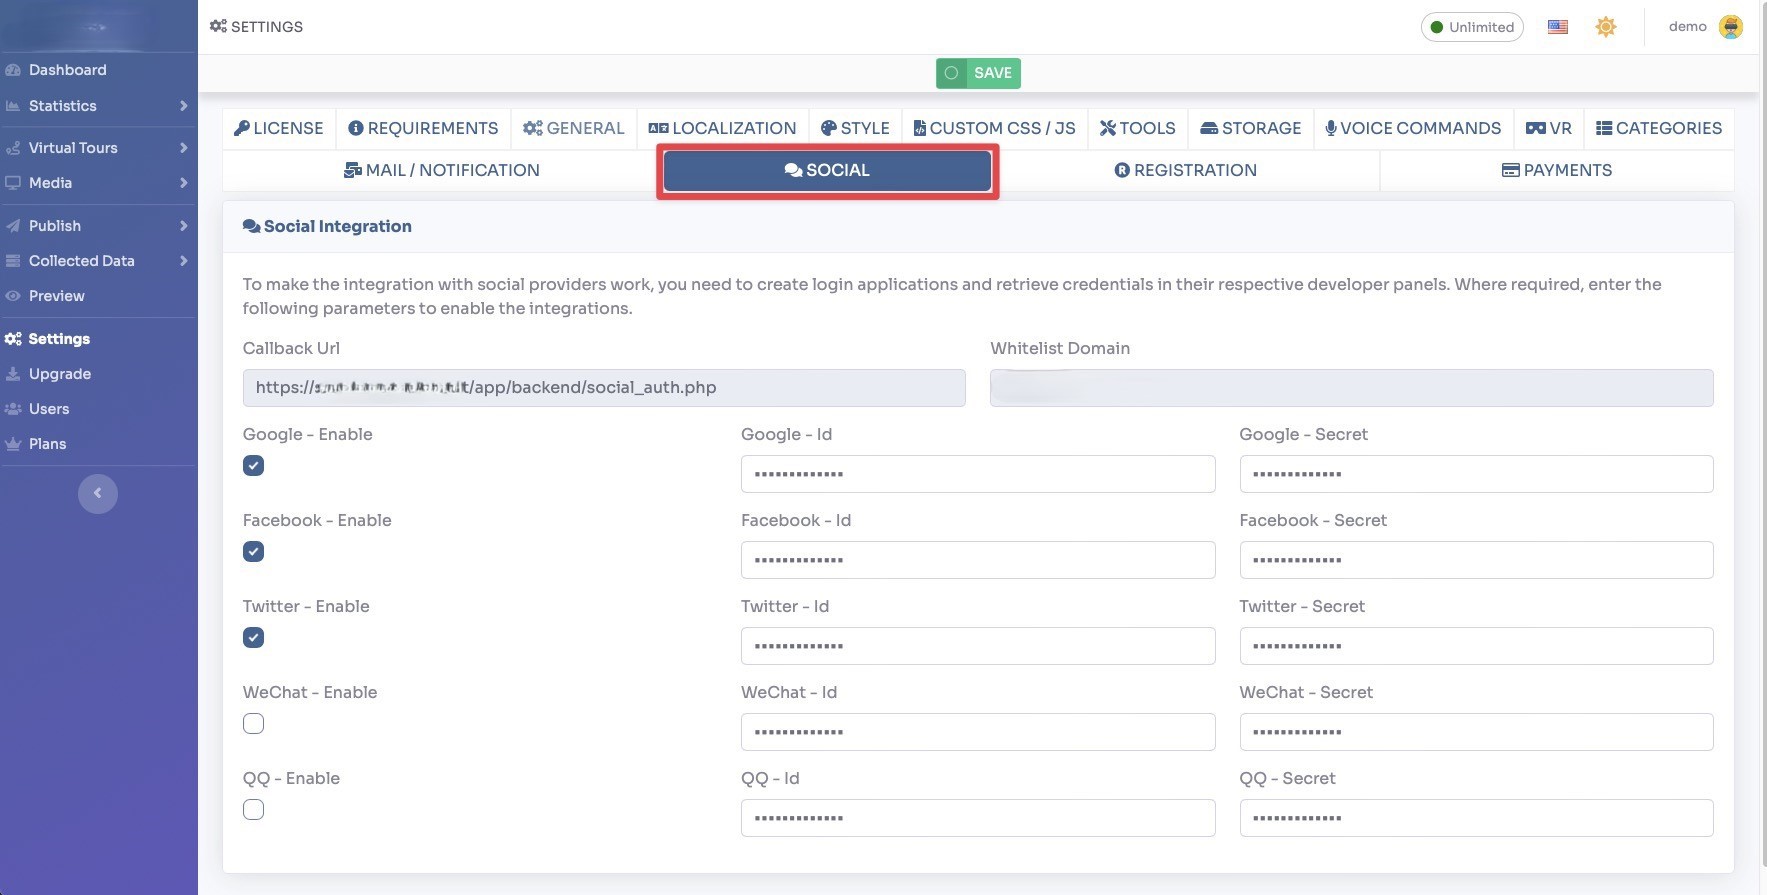
Configure Social Logins
Select Render Walk → Settings, from the side menu. Go to tab Social.
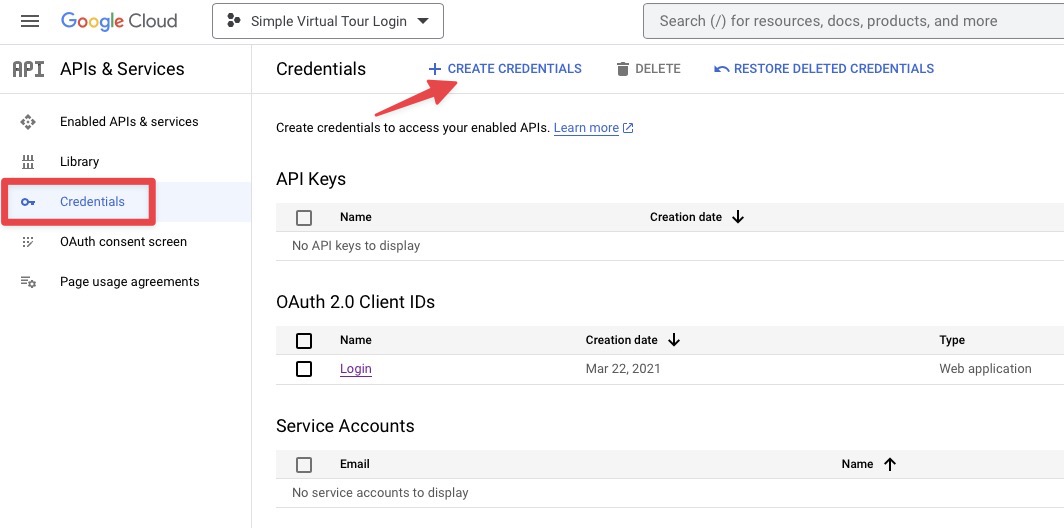
Go to Google Cloud Console site.
Create a New Project.
Go to Credentials from the side menu and click on Create Credentials.
Create a OAuth Client ID with type Web Application and fill Authorized JavaScript origins with your website URL and Authorized redirect URLs with the callback URL that you find in the backend settings.
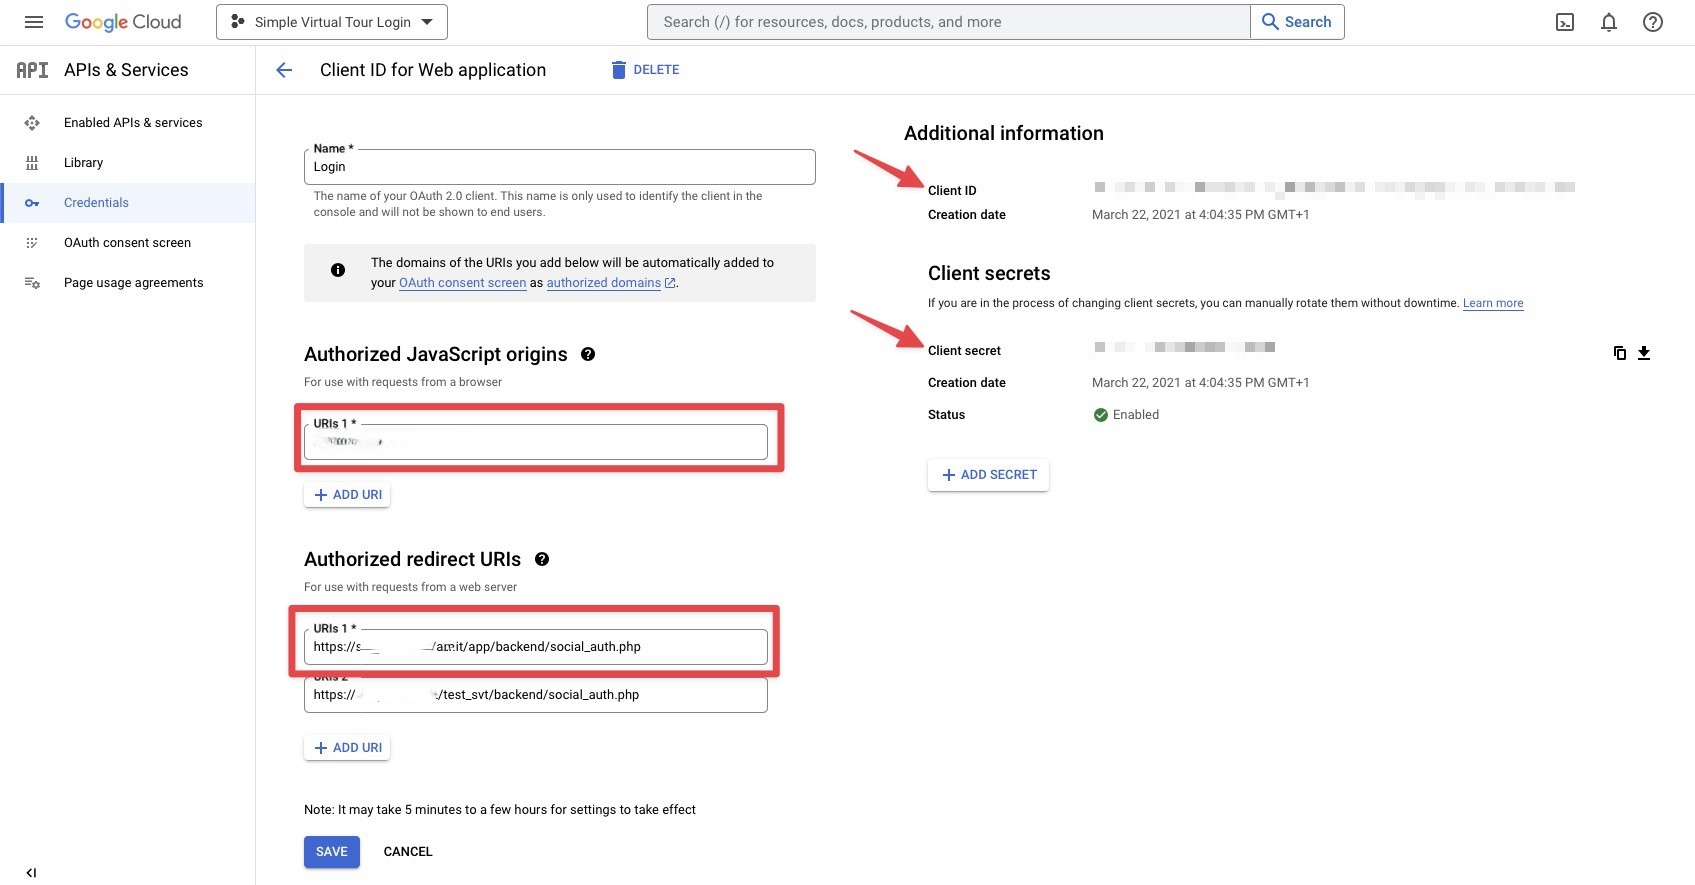
Copy Client ID and Client Secret into the settings and enable Google - Enable.
Go to Facebook Developer site.
Create a new application by clicking on the Create App button.
Select Allow people to login with their Facebook account.
Now you need to verify your business and fill all the details into Settings → Basic, then go to the Publish section and follow the onscreen instructions.
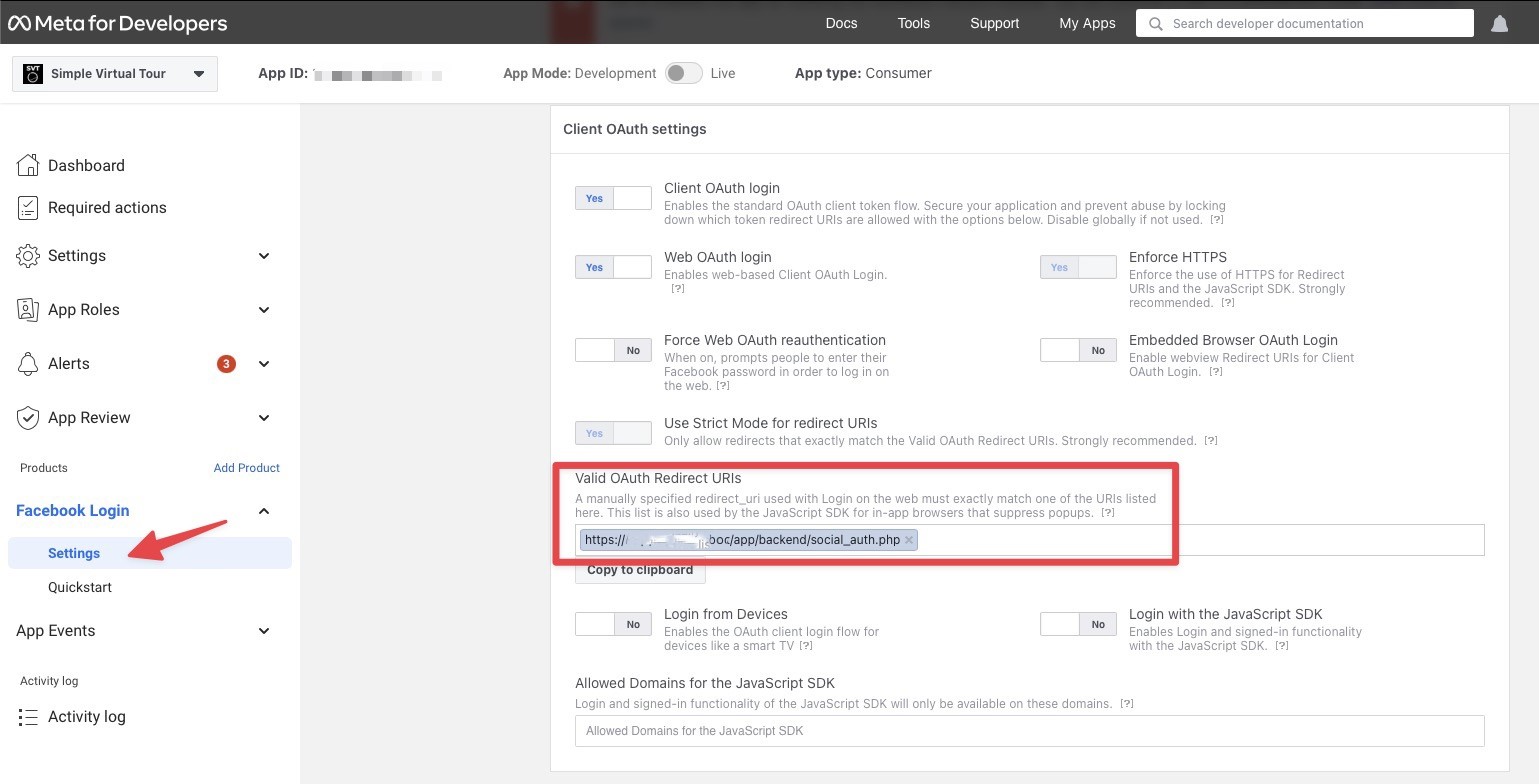
Go to Facebook Login → Settings and fill the Valid OAuth Redirect URLs with the Callback URL that you find in the backend settings.
Go to Settings → Basic.

Copy APP ID and APP Secret into the settings and enable Facebook - Enable.
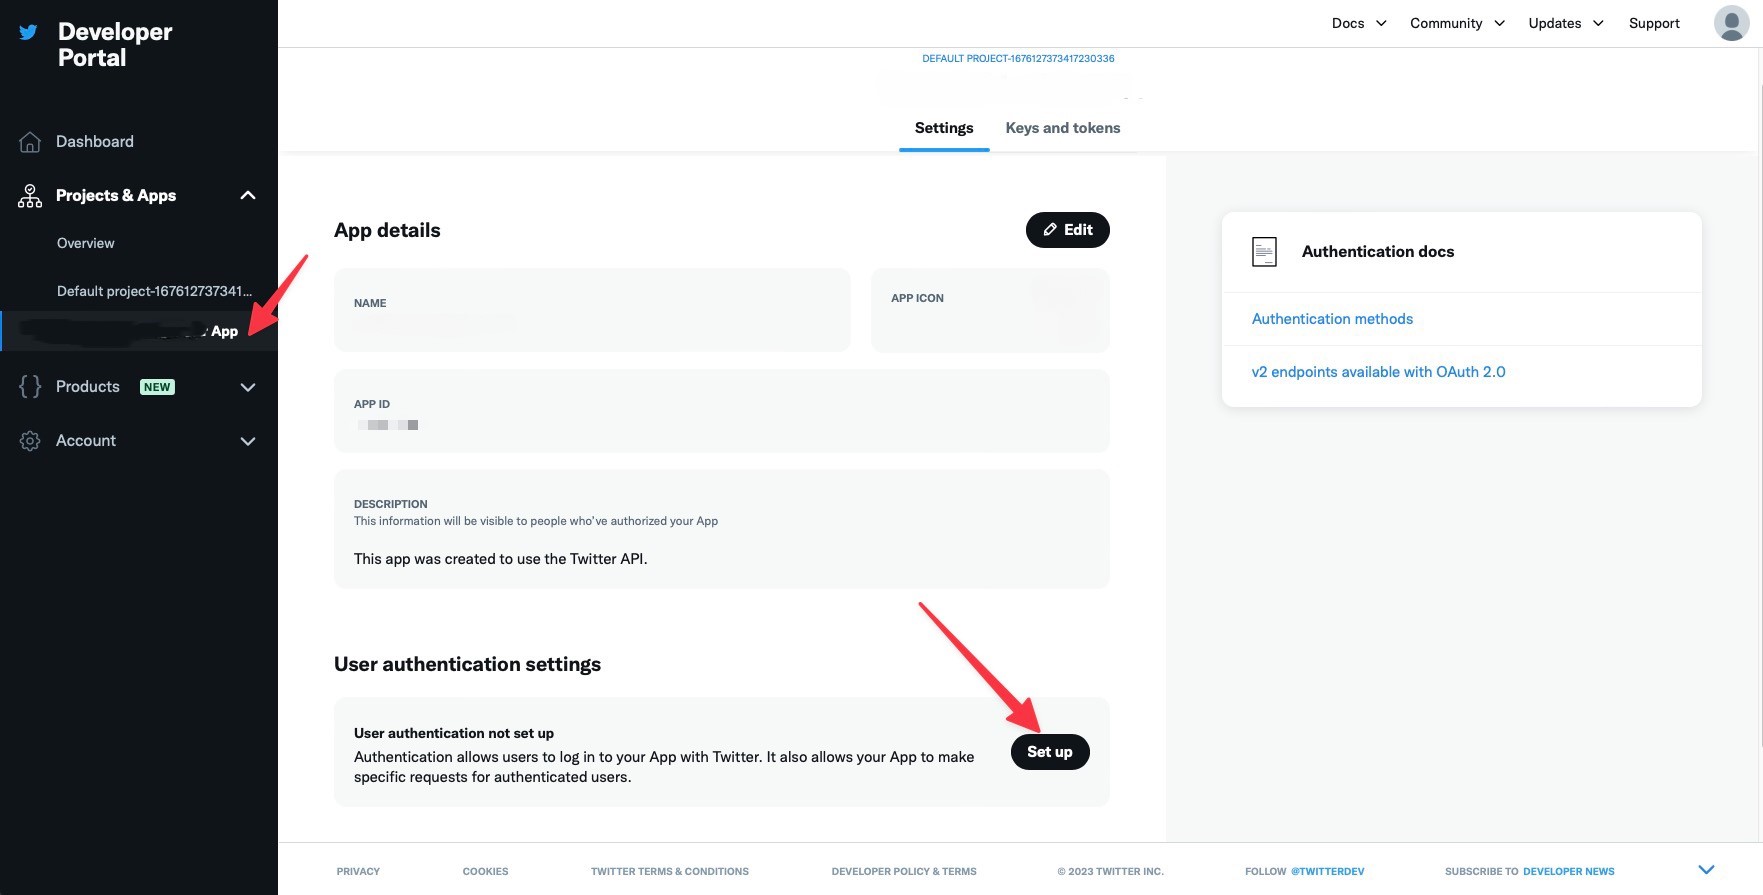
Go to Twitter Developer site.
Inside your application click Set Up on User authentication settings.
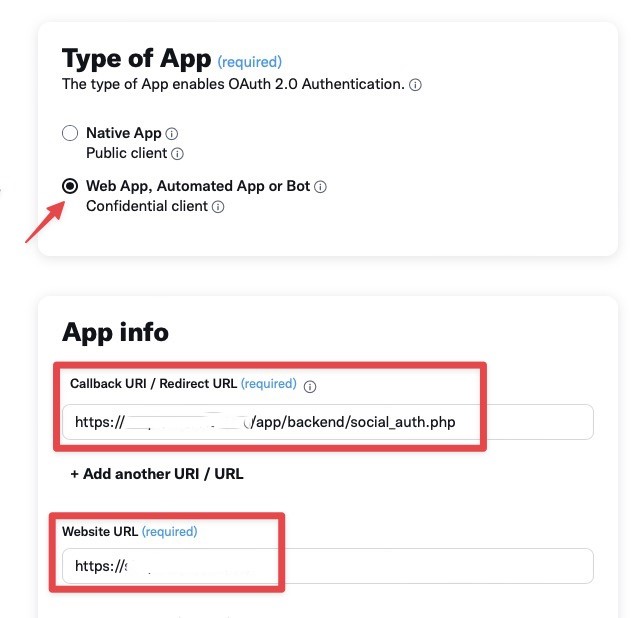
Set Type of App as Web App and fill the Callback URL and the Website URL.
Go to Keys And tokens and click Regenerate.
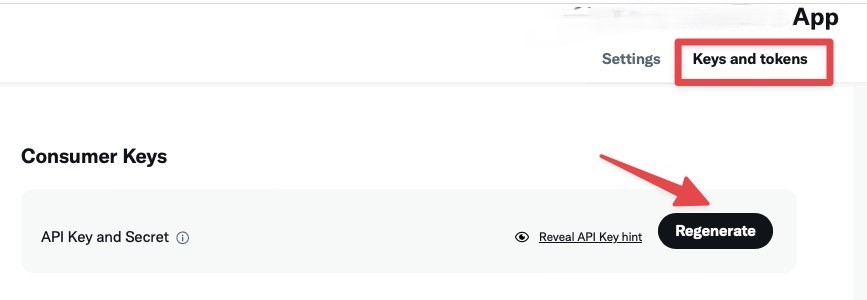
Copy API ID and API Secret into the settings and flag Twitter - Enable.